No products in the cart.
In this blog, I start disclosing my editing workflow, and the first topic I'd like to introduce is Luminosity Masks.
Luminosity Masks are something you might have heard before, mostly if you shoot Landscape/Cityscape. In a nutshell, they are selections based on tones that allow for refined adjustments.
In their basic form, they broadly target highlights and/or shadows. But they can be further refined to include mid-tones or narrow down an image's brightest and darkest areas.
Note:
In this post, I'll mention Adobe Photoshop almost exclusively.
I suppose you can achieve the same results in Affinity Photo, but I don't know enough about it. Lightroom CC recently introduced a similar functionality (called Range) but is less customisable.
Despite being such a powerful tool, Luminosity Masks are still seen as daunting and not many photographers use them. I suppose one of the reasons is that they're created manually, and there's no button or menu item for them. But you can find third-party solutions to help you create them, and I sometimes use a couple of those myself.
Perhaps they're considered too tedious as well. Why would someone go such a long way only to create a selection?
Well, I do that. And quite often as well. So let's see if I can convince you here.
A quick intro to creating Luminosity Masks
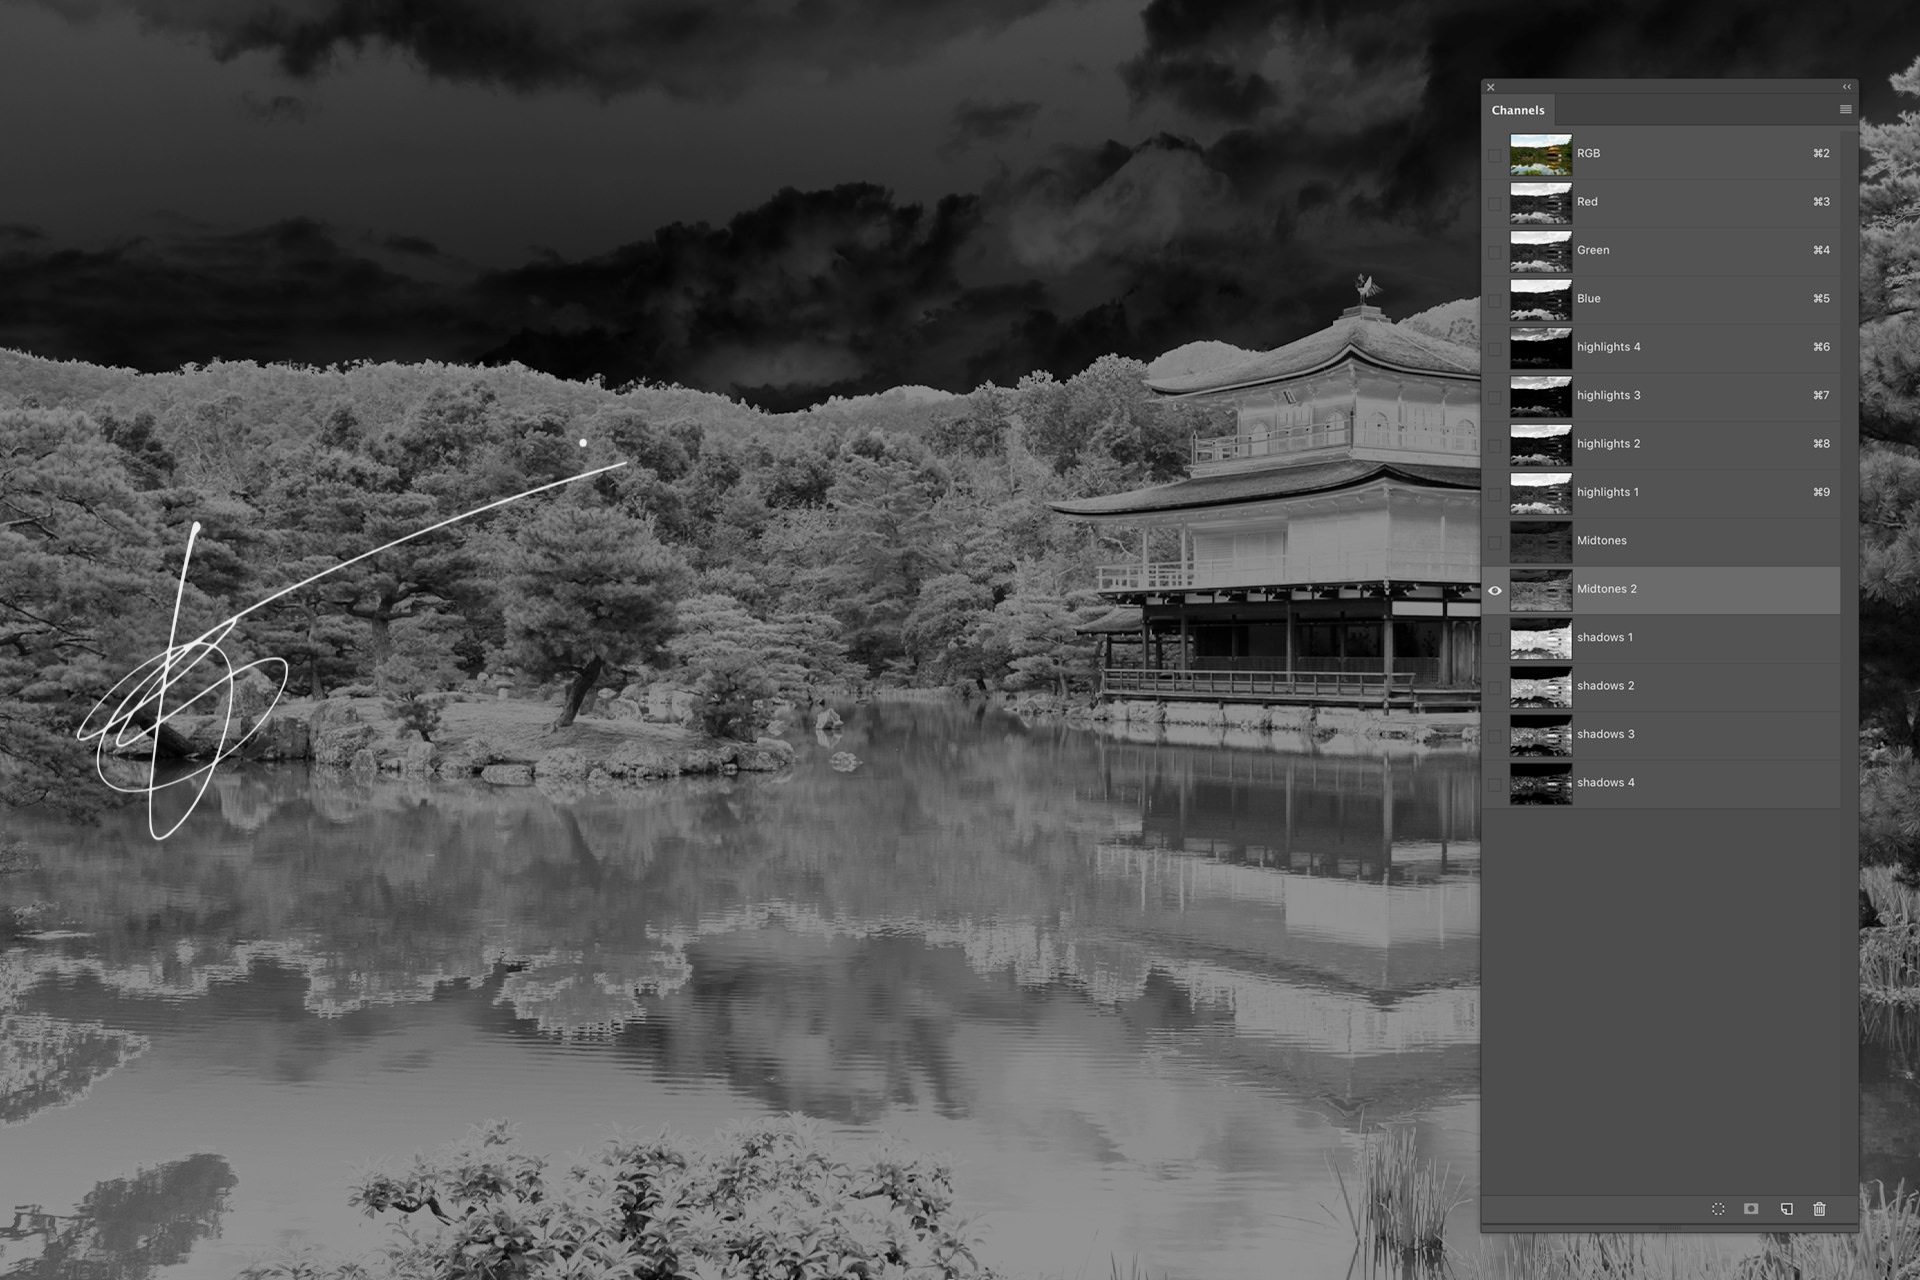
As I mentioned, the basic Luminosity Masks broadly target highlights or shadows. They are easy to create from the Channels panel:
- Cmd/Ctrl + click on the RGB thumbnail in the Channel tab;
- Save the selection (Select > Save Selection or click the Save Selection icon in the Channels tab);
- Cmd/Ctrl + D to deselect.
That's it! You created your first Luminosity Mask based on the highlights.
Bonus Tip:
if all you need is a quick selection of the highlights, simply hit Cmd/Ctrl + Opt/Alt + 2, and Photoshop will make it.
You can then invert it with Cmd/Ctrl + Shift + I to select the shadows.
Now you can quickly make another selection for the shadows: duplicate the channel you just created (right-click on that) and then invert it with Cmd/Ctrl + I.
Remember to rename your channels, so you don't get confused, particularly if you're going to create more. Highlights 1 is your first, Shadows 1 is the duplicate. The number 1 in the name will help later when refining.
Not just Highlights and Shadows
But what about mid-tones? Well, it's a bit less straightforward, but it's quick once you create the Highlights 1 and Shadows 1 channels:
- Hit Cmd/Ctrl + A to select the entire image;
- Cmd/Ctrl + Opt/Alt + click on the Highlights 1 thumbnail;
- Cmd/Ctrl + Opt/Alt + click on the Shadows 1 thumbnail (if you get a warning “no pixels are more than 50% selected”, you can ignore it);
- Save the selection and name it Midtones 1.
What we've done here is subtract Highlights and Shadows from the image, leaving us with the mid-tones :)
To refine the Luminosity Masks, follow the same subtraction process.
Take, for example, the Highlights:
- Cmd/Ctrl + click on the Highlights 1 thumbnail;
- Cmd/Ctrl + Opt/Alt + Shift + click on the same thumbnail;
- Save the new selection and name it Highlights 2.
So on and so forth. You get the point ;)
The whole process above is merely a way to create selections. You haven't applied any changes to the image yet. You still need to go through the usual changes you would apply: Curves, Levels, etc. But now you have a precise selection of the areas you wish to enhance.
Also, remember that “white reveals, black conceals”: the brightest areas of the masks are those where the effects will be visible. The channels you created will give a clear idea, at a glance, of the impacted areas.
Use of Luminosity Masks
Now that you know how to create Luminosity Masks, let's see how you can use them.
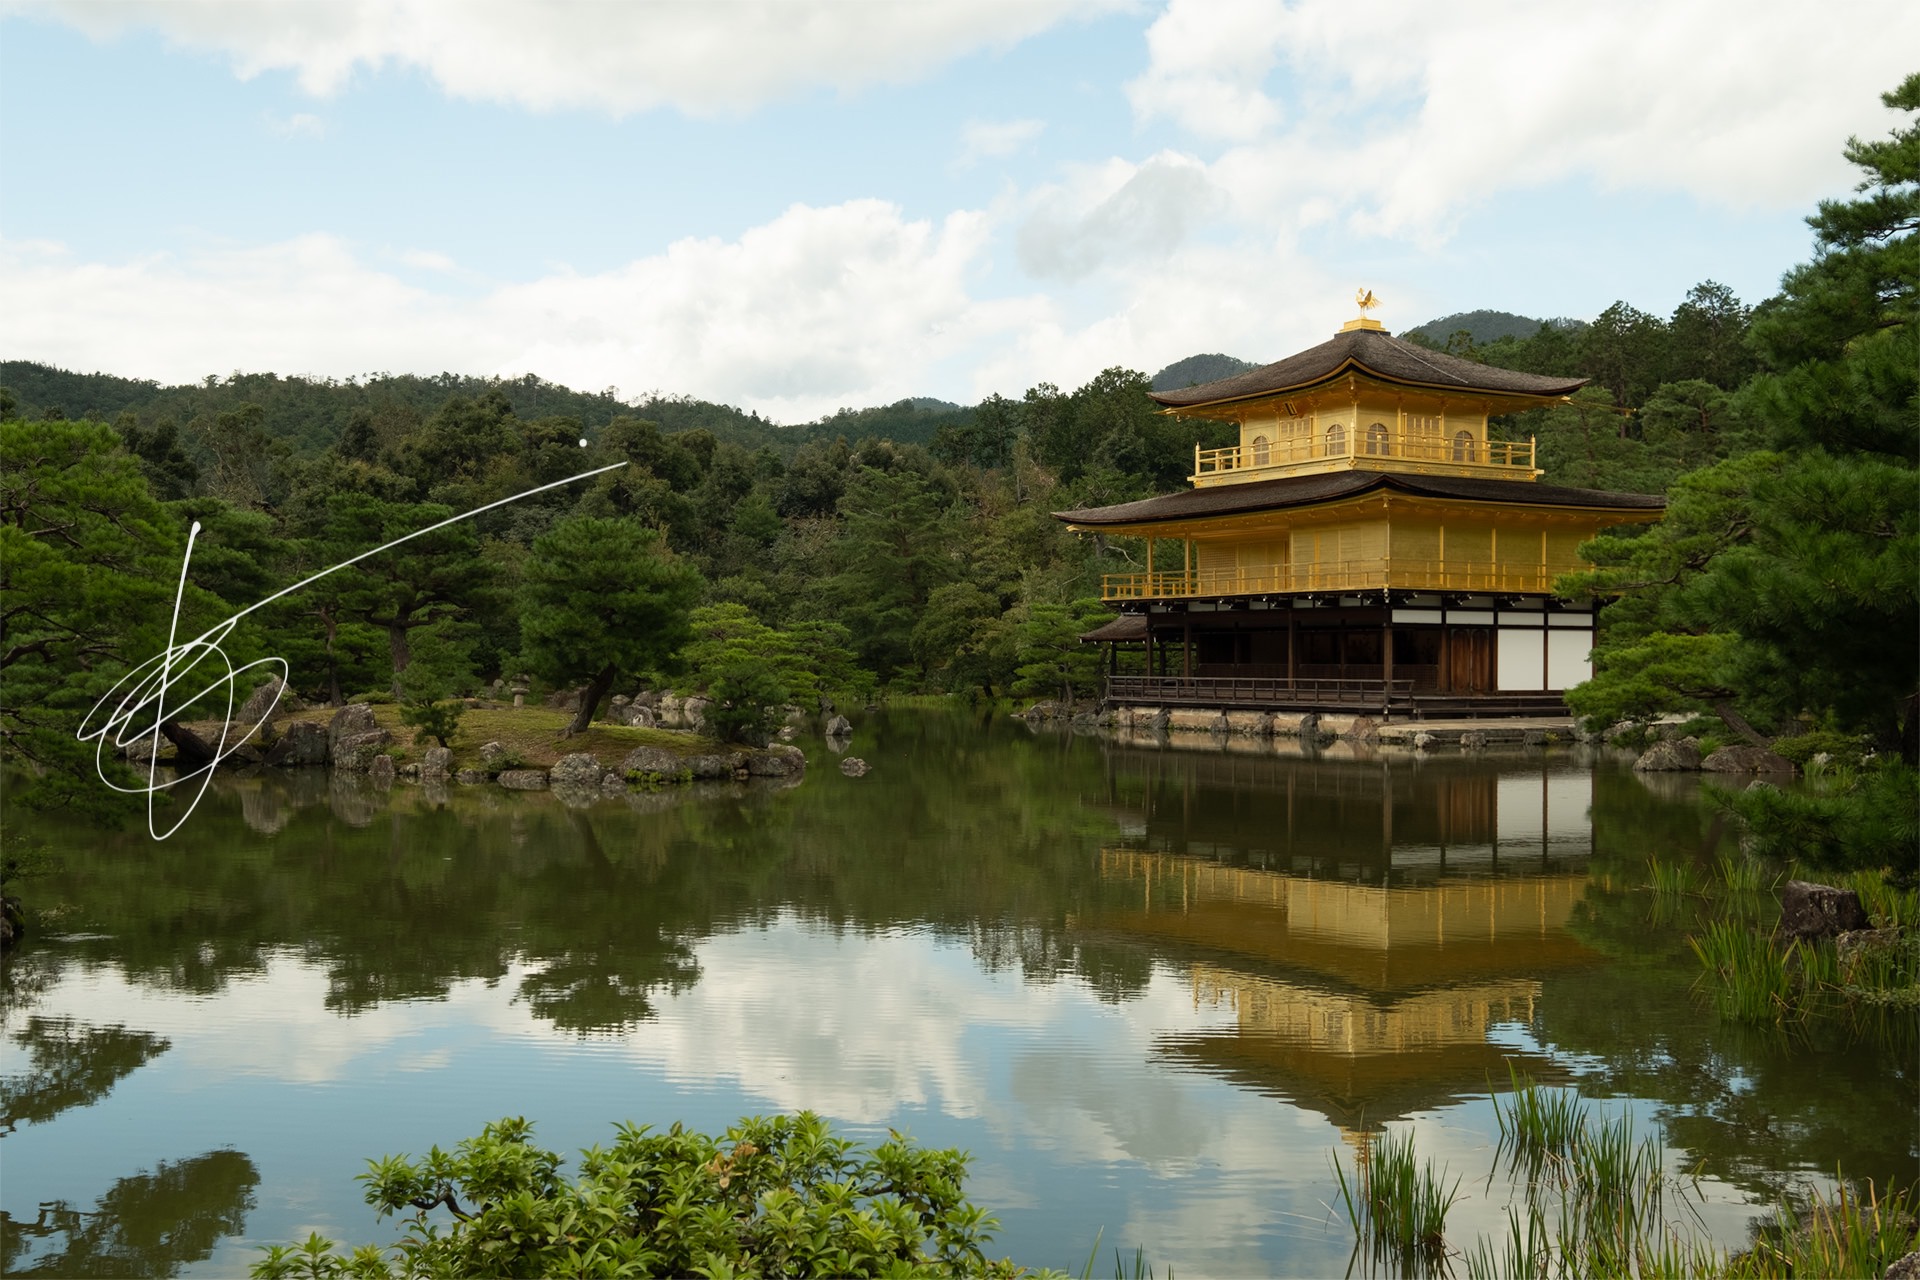
Original photo
Let's start by taking the highlights as example again. This is one my shots, straight out of camera, from Kinkaku-ji in Kyoto.
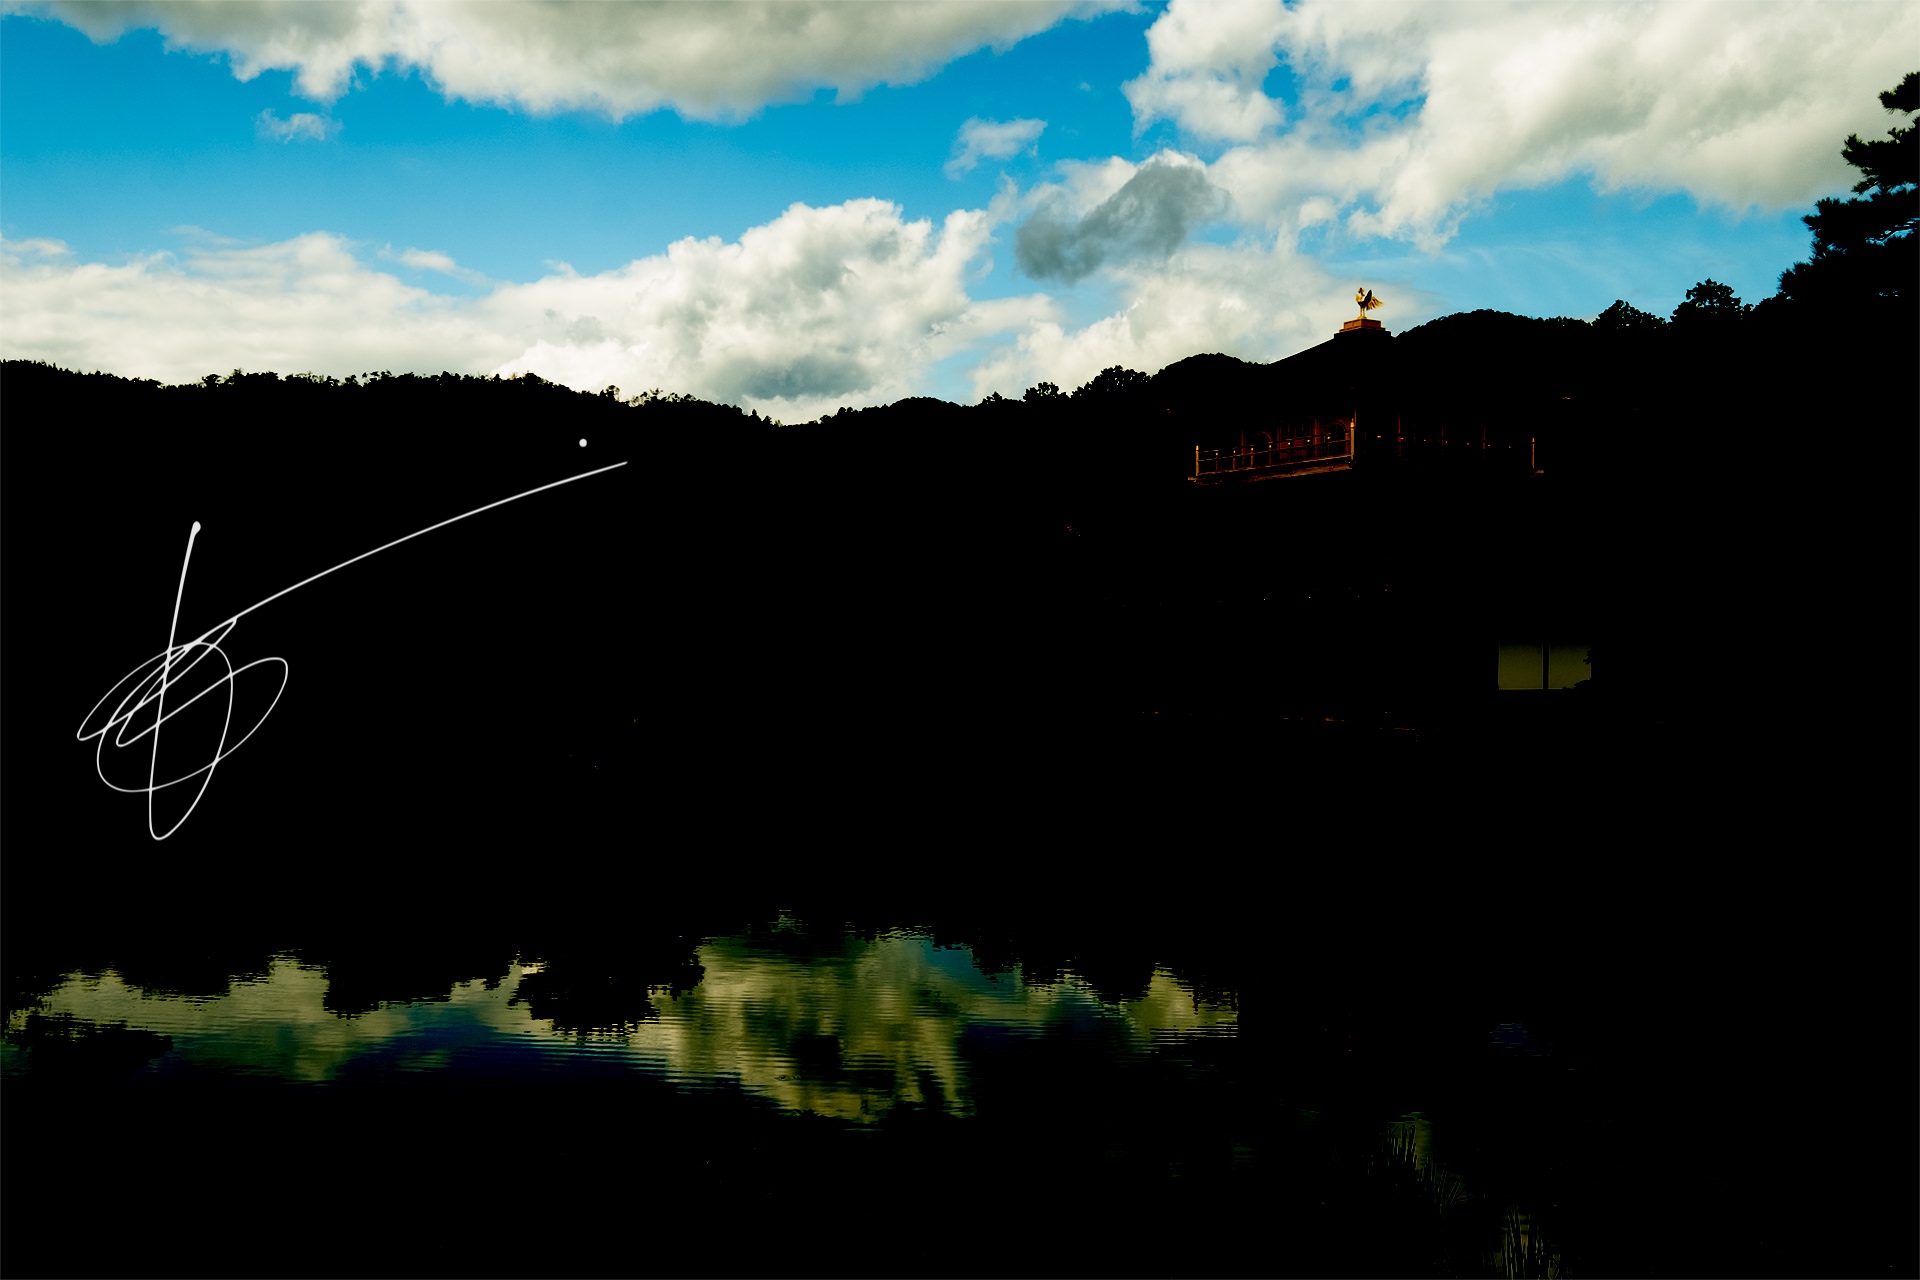
The wrong approach
Notice that here the sky is overexposed. An easy fix is to create a new Curves adjustment layer (aka Curves in a non-destructive way) and try to darken the sky. But in order to retrieve colour and detail in the sky, we have now darkened everything else! Oh no!
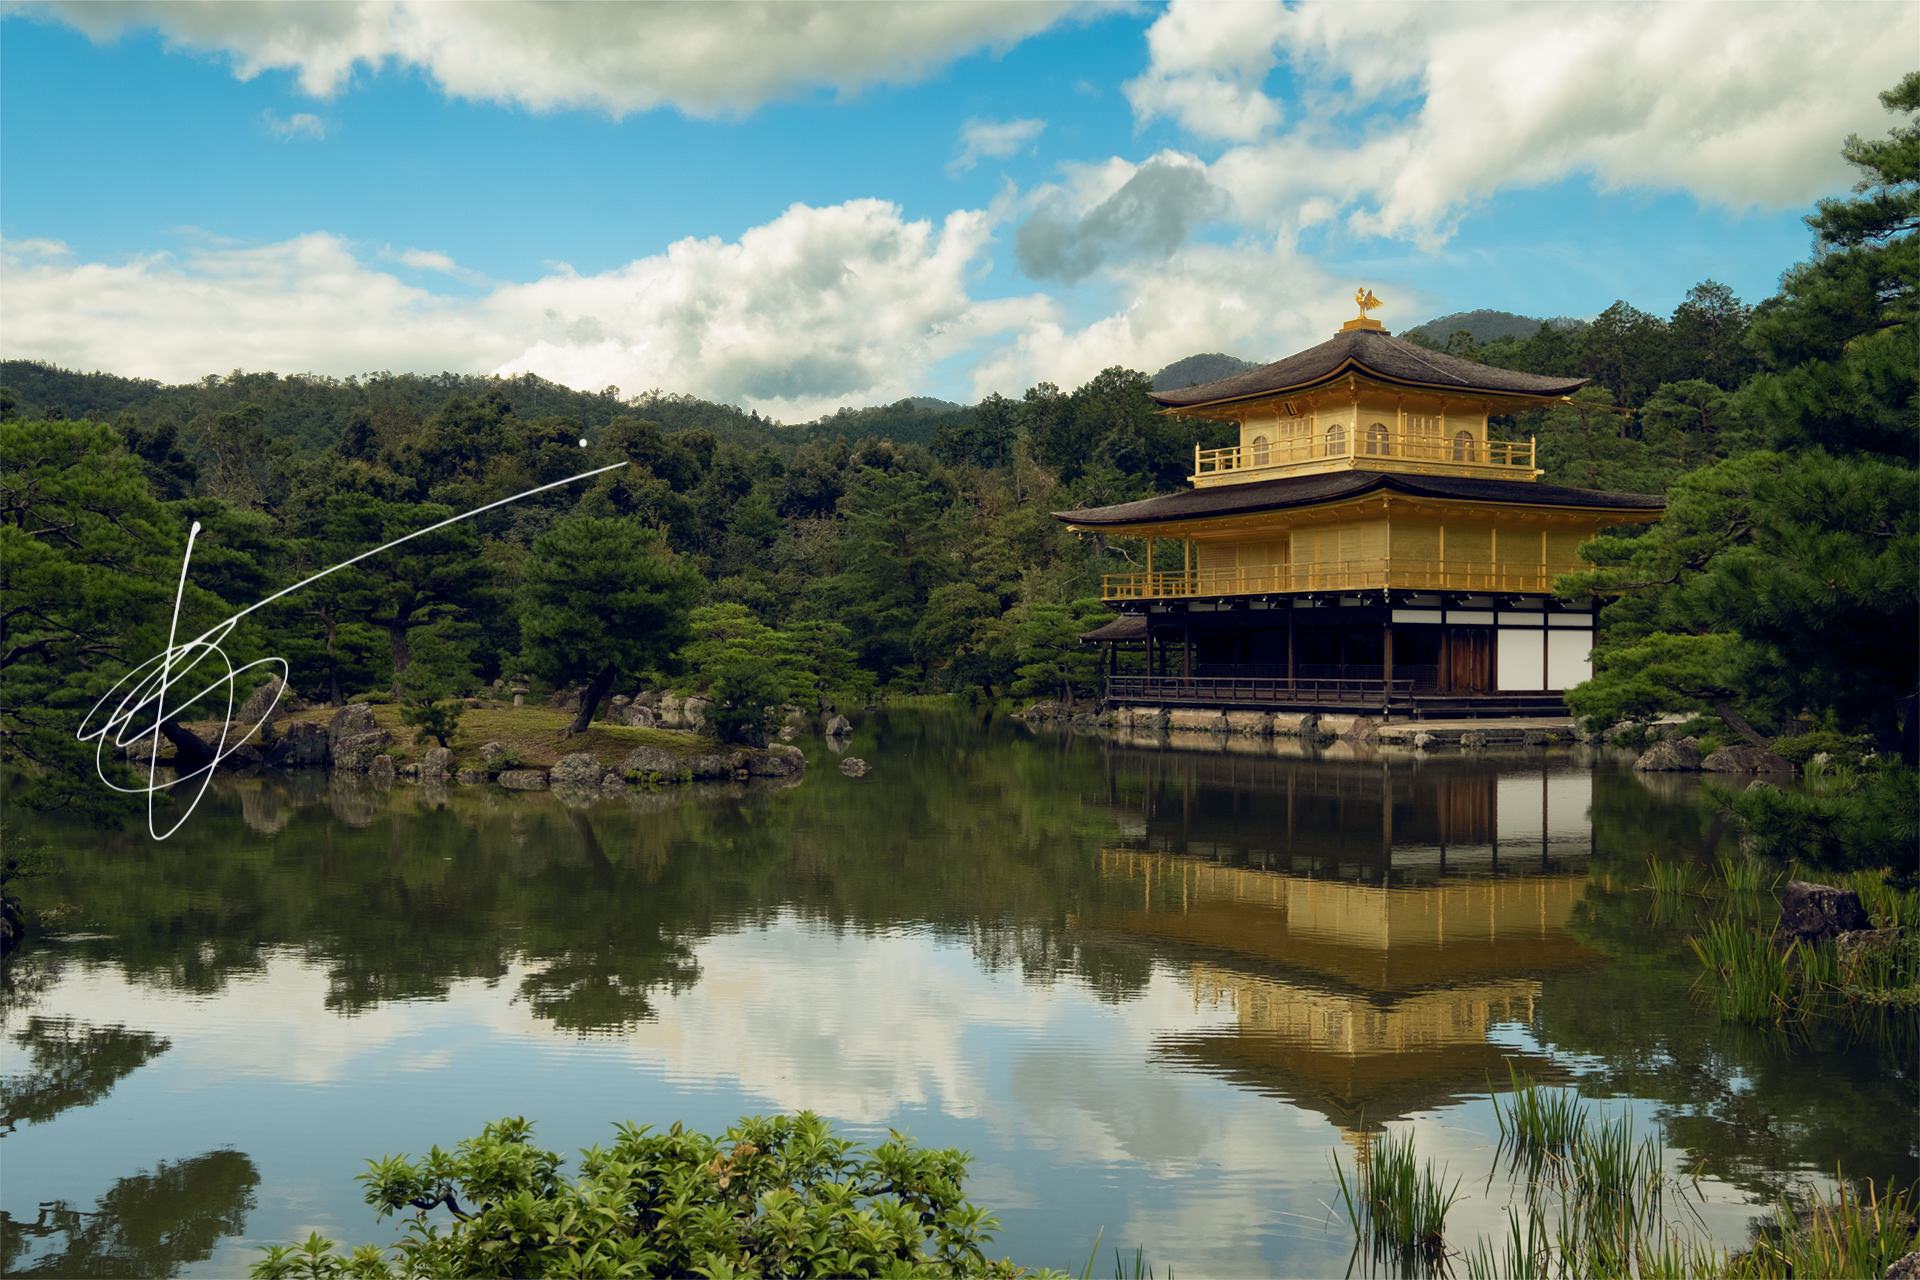
Basic Luminosity Mask (Highlights)
Now let's create our basic Luminosity Mask for the highlights. After we save the new channel, hit Cmd/Ctrl + click on it to activate the selection. Then let's move to the image, mask the layer and apply the Curves fix again. That's much better. The adjustment only applies to the sky, leaving the rest of the image untouched. Now that you know how to do it, don't you find it very fast and easy?

And then the Shadows
Let's see if we can do something to the shadows as well… Creating another Luminosity Mask, for the shadows, we are able to selectively change the colours to eliminate the yellow cast over the image (subtle, I know).
Now this is becoming interesting.
What's next?
We only scratched the surface here. Once you start using Luminosity Masks, it becomes very easy to start experimenting with them.
And you're not limited to recovering highlights and shadows with Curves: you can use all sorts of adjustments with this method. Solid Color, Photo Filter, Hue and Saturation, Levels, Color Balance… You can apply them to everything you already use in Photoshop.
But my favourite application of Luminosity Masks, by far, is blending multiple images together.
Blending
This will likely require a full tutorial on its own, but let's briefly talk about it.
Often when I shoot landscapes and cityscapes I shoot multiple images of the same subject, tweaking the exposure at every shot. It's a process known as bracketing, and most cameras nowadays offer this function at the push of a button.
This is useful because cameras aren't always capable of showing the entire dynamic range of a scene in a single shot. So, often, photographers do this to have a broader dynamic range to work with.
It's the idea behind HDR photography (HDR stands for High Dynamic Range) which is even available in smartphones now.
Using Luminosity Masks, you can make more refined adjustments and use only the best bits of each shot. And since they can be applied to as many layers as you wish, there is room for significant enhancements.
Let's see a quick example:
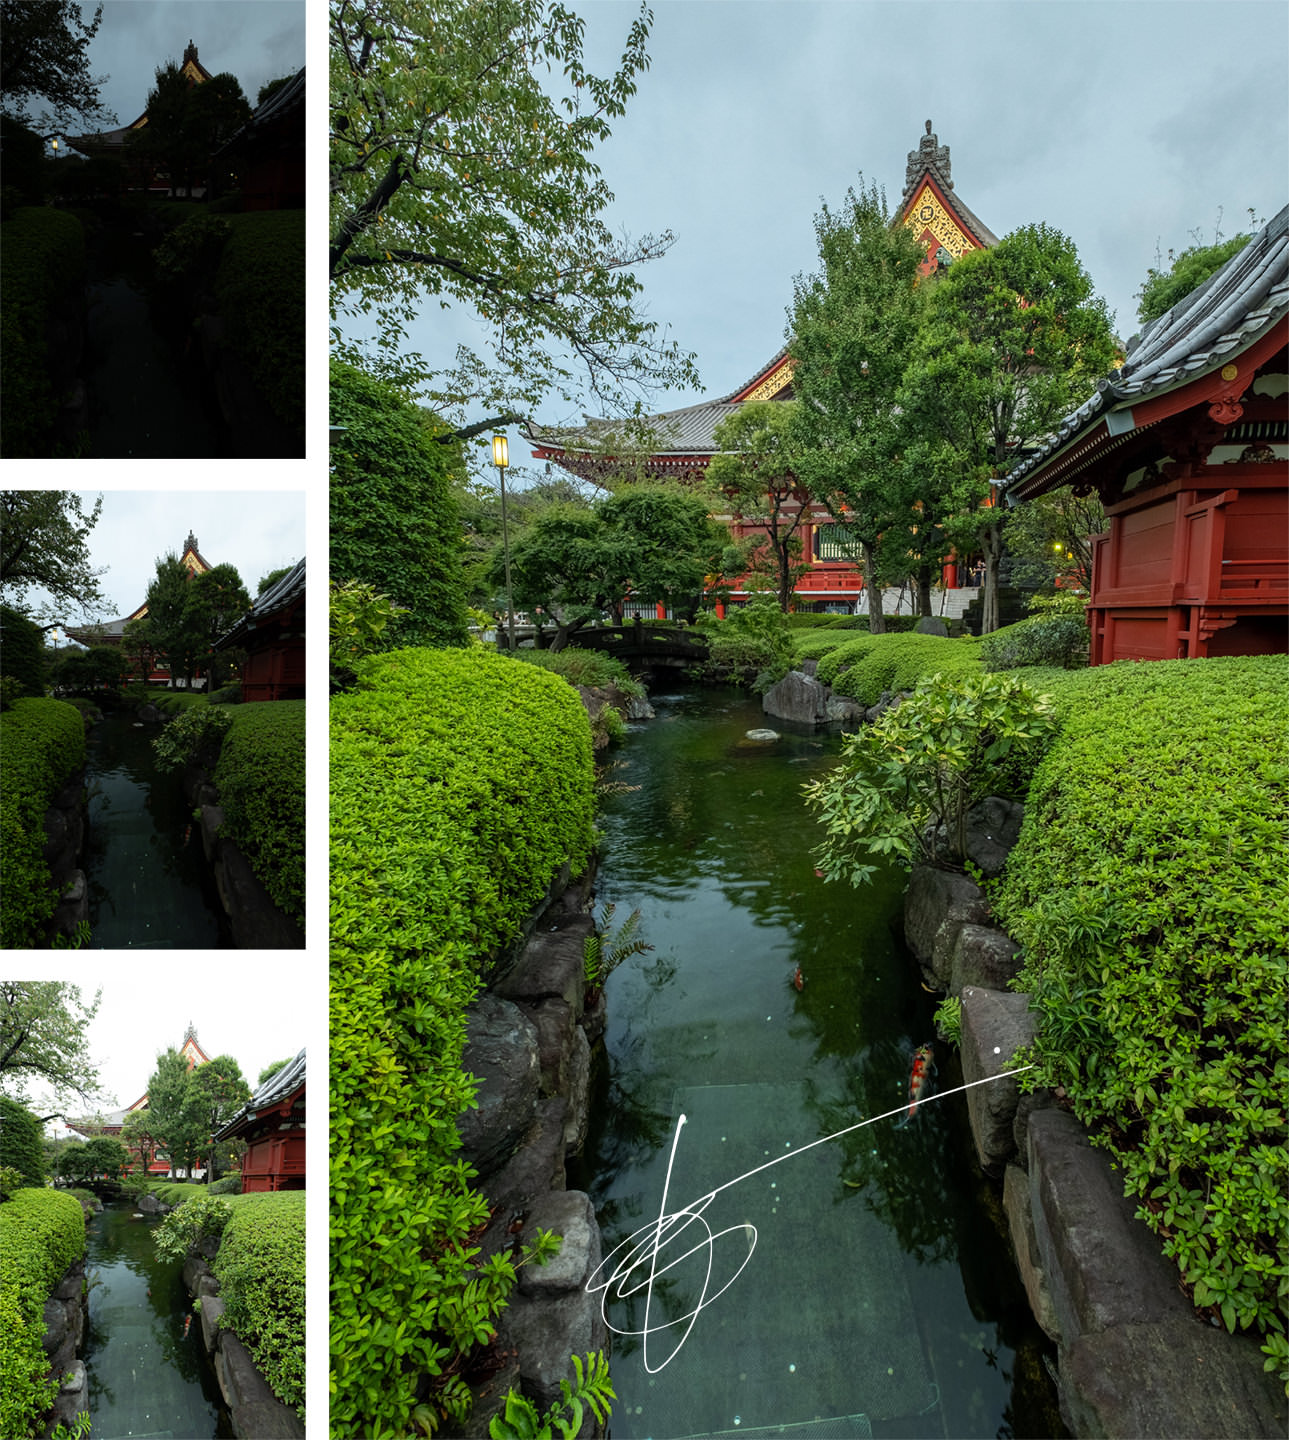
Assuming you shot bracketed with your default settings in camera, you should have 3 photos of the same subject: one base image, one darker and one brighter.
If you didn't use a tripod, first align your images using Edit > Auto Align Layers (leave the settings as they are). This should align your shots correctly, probably leaving some empty areas around the edges that you'll have to cut out. You shouldn't have this problem when using a tripod.
Create your Luminosity Masks following the instructions above. Then, apply the Highlights 1 to your darker shot and Shadows 1 to the brighter one.
Depending on your image, this might require some further refinement. But you quickly recovered details from shadows and highlights without tweaking the exposure that could have introduced noise or artifacts.
And it's a much more controlled way to apply HDR-like enhancements to your photos. There is another example in this post, together with the video tutorial.
Wrapping up
This is my quick introduction to Luminosity Masks. I use this method extensively in my editing workflow to blend multiple exposures.
Hopefully, I explained it clearly enough to inspire you to use them too. This is a start. The possibilities are endless.
And that's it for my first editing workflow tutorial.
Hope you enjoyed it.
If you have any questions, just pop them in the comment section below!
update, Oct 2023:
Adobe has introduced advanced masking tools in Lightroom Classic and Lightroom CC that makes the editing a lot easier. They are not full substitutes for Luminosity Masks though.
Did you find this article useful?
Thanks for your feedback!