No products in the cart.
Listen to the automated audio version of this article:
0:00
0:00
I’m publishing a video editing breakdown of my latest YouTube video, “Fog”, to thank you all. The feedback you are giving me on these latest cinematic vlogs and the response on YouTube have been incredible. I am still a very small channel and seeing that my recent videos are watched by thousands of you means a lot. A lot.
So, thank you all very much!
This video editing breakdown is split into 3 sections. Well, first I introduce you to the concept and my main rationale behind some choices. Then come the 3 sections.
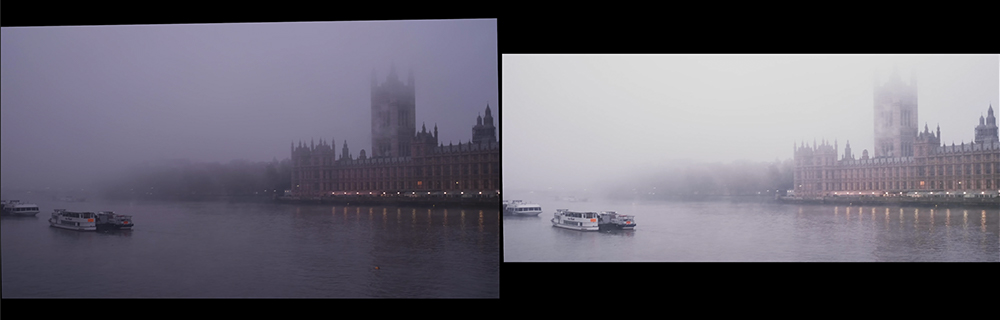
Firstly, on the top left, you’ll see the raw footage. No edits, no grading, just the way it was captured on camera.
Secondly, on the top right, is the final result with all the bells and whistles. The one you may have watched already.
Finally, the bottom half shows my entire timeline in Premiere Pro. You can see how I worked with sound design, where I applied effects, etc.
I don’t think it is too complex. However, it shows how I thought about developing the story and editing the footage. I found video editing breakdowns like these really helped me when I started learning to edit. And I hope this video of mine can help others too. Particularly if you’re just starting out and looking for an easy way to assemble a video together.
The video
I already explained what this video editing breakdown is, so let’s jump straight into it:

And here’s the direct link, in case the embed doesn’t work: https://www.youtube.com/watch?v=T5jAKXjgWYg
If you wish to watch the full video on full screen, without the editing breakdown, you do it here.
By the way, one of the photos I included in the video is still available to purchase as a print in my Limited 10 series. It’s one of my favourites of the series and it’s hanging on my own living room wall. I jut love it.
If you have feedback or even recommendations on how to improve these video editing breakdown posts, please leave a comment here or on YouTube.
And again, thank you all very much for the great support!
Cheers!