This may be old news, but I often hear this question about Lightroom presets.
The Problem
Over a year ago, Adobe decided to refine (= overhaul) how presets work in Lightroom. All of a sudden, some of my own presets were not showing in the Develop panel anymore. And the same happened to others.
In some cases, all the presets were showing, but some had their names in italics or greyed out.
If this happens to you, it's because Adobe considers them only partially compatible with the active image. This may be because some tweaks in the presets may be camera-specific. The most common culprit is the active colour profile when creating the preset.
Adobe Lightroom comes pre-packaged with its own internal profiles and some ad-hoc ones to match cameras.
For example, I use Fujifilm cameras, which have their own film simulations. In Lightroom, I would then choose the relative profile to give the RAW file the same tone I intended when shooting. And the profile is named after the film simulation. For example, Classic Chrome.

If I were to export a preset with this profile applied and give it to somebody who edits Canon files, the profile names would not match. The Lightroom presets are still perfectly compatible, but because of the mismatch, Adobe decides they are not.
In the past, Lightroom simply ignored any non-compatible setting. So I could have kept my camera profile in the presets with (almost) no issues. Lightroom would have reverted to Adobe Standard and applied only the compatible tweaks.
But today this gets flagged. And while this could be useful to immediately see a camera mismatch, it has indeed caused a bit of confusion…
The fix
The reason why people still ask questions about Lightroom presets visibility is because the default setting is to hide the “partially compatible” ones. So you might buy presets and still not see them in Lightroom after you load them. I suppose Adobe decided to do so to remove clutter from the interface.
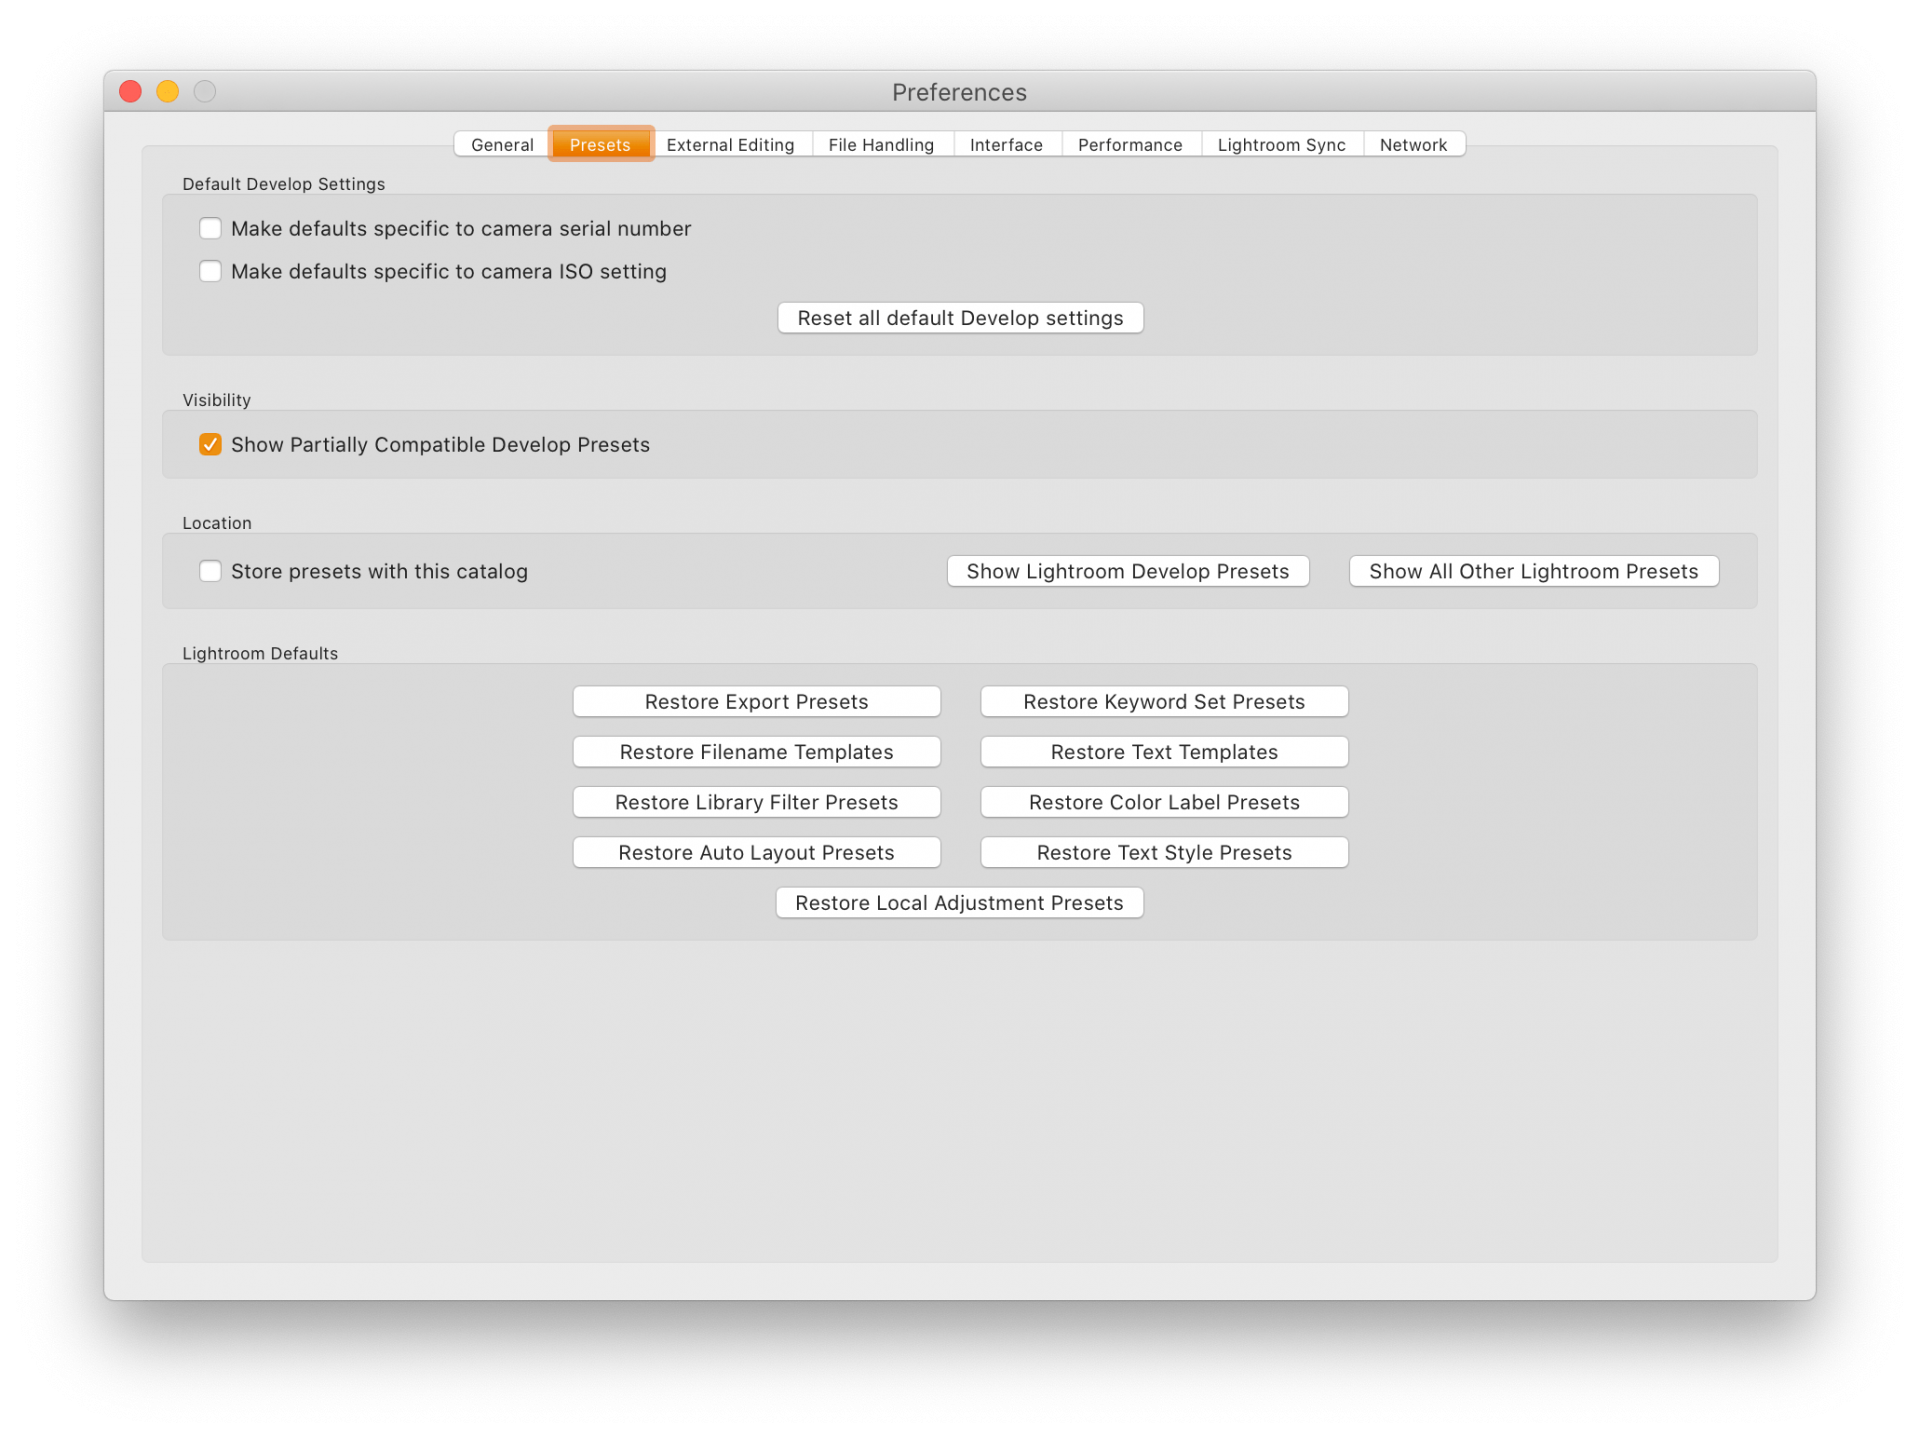
You can find the setting in the Preferences panel under Presets.
At least the fix is quick and easy. In order to see every preset, you need to go to File > Preferences and tick the box next to “Show Partially Compatible Develop Presets” (why this setting is in title case, I don't know).

From a Lightroom presets creator point of view, all it takes is making sure the profile and lens correction are left out of the preset. And I recommend that anything in the Transform panel is left out as well: other people won't have your same cropping needs!
It's not enough to revert a setting to Adobe Standard because this will override somebody's camera profile if it was already set. Just leave the profile out.
Unless you create brand-specific tweaks, of course. Like my Fujifilm Sharpening helpers.
My Lightroom presets
Of course, I do have my own presets that I regularly use to speed up my workflow. For example, to convert my photos into beautiful and punchy Black and White.
I mentioned this in my recent post about what to expect this year from me, so it will happen soon.
I don't want to create pointless bundles, so I'll group them into themes with a coherent workflow. Hopefully, you'll find them more useful this way.
And, of course, I will take into account what I described above. So you can be sure my Lightroom presets will not be flagged as incompatible.
Subscribe to my newsletter to be the first to know and receive a discount code for any item in my store.


