No products in the cart.
Listen to the automated audio version of this article:
When you’ve been a photographer for many years, you give some knowledge for granted, and the Rule of Thirds is certainly among those. But as of today, this is still the most searched photography-related topic on Google. So maybe I should write about it.
If there’s enough interest, I might cover more Photography basics. Let me know in the comments if it’s something you would like to see here.
What is the Rule of Thirds?
The Rule of Thirds is perhaps the most ubiquitous rule of composition and one of the first things beginners learn about in classes since 1800. Very briefly, it can help create well-balanced and interesting images.
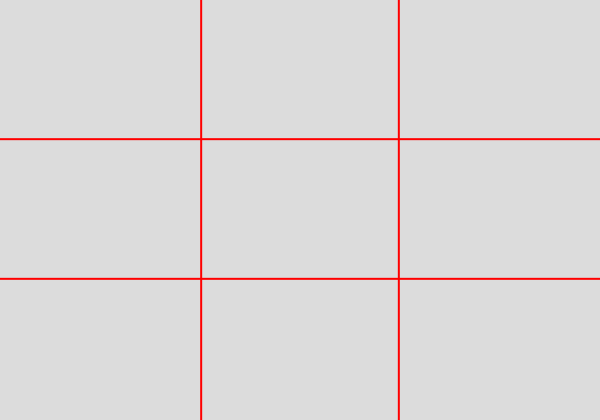
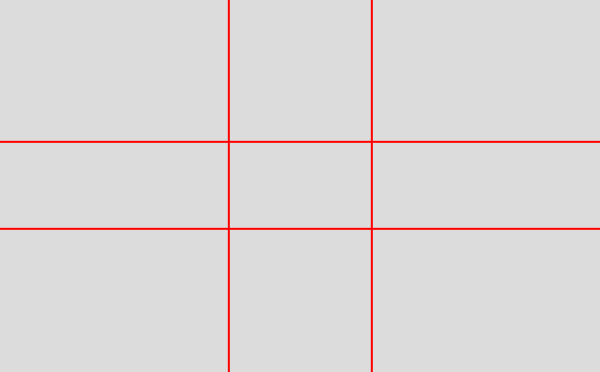
The basic principle is to imagine breaking an image down into thirds, horizontally and vertically. This will split the image into 9 sections.
More importantly, though, this split creates intersections. Inter-sections… Inter comes from the Latin, meaning “between”… Get it?
So, between the 9 sections, you now have 4 lines and 4 points. These identify the important parts of the image in which you should consider placing points of interest as you frame your image.
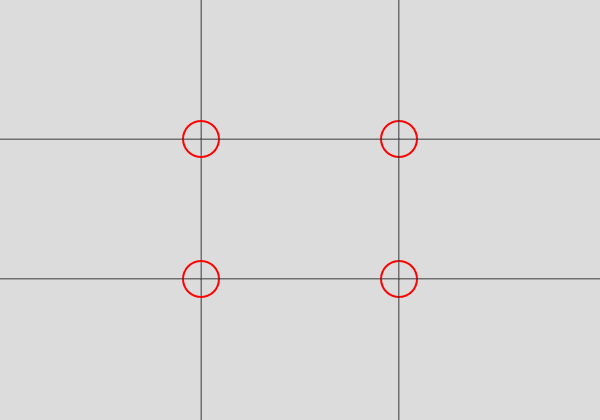
The theory is that if you place points of interest in the intersections, your photo becomes more balanced and natural to the viewers’ eyes. A few studies show that our eyes are naturally drawn to these intersections when looking at an image. This is what the Rule of Thirds helps you achieve.
Examples

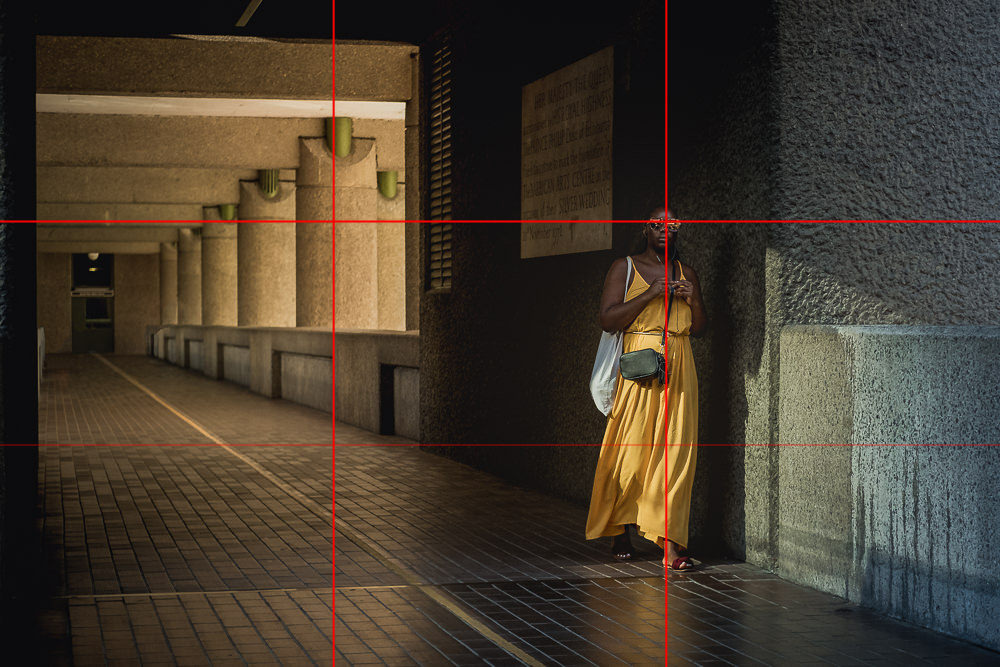
So, next time you go out and wish to apply the Rule of Thirds, you need to ask yourself what are the points of interest in your shot and where you want to place them. It might take a little time and practice to become second nature, but the more you try, the easier it will be.
Luckily, you can count on some little help. Most cameras and devices (if not all) now have an option to turn on and off a Thirds grid on the screen. This way, you always have a visual hint to help frame your shot. And it’s there in editing tools as well. So even if the shot is not perfect, you can always crop and reframe your image later to get it right.
You could even try it now with your old photos. See if they have a different impact when you apply the Rule of Thirds.
Try it now and practice it. Before you know it, you’ll have mastered the Rule of Thirds.
And will be ready to break it!
Different composition rules
To be honest, I wasn’t sure I would add the following chapters straight away. All the information in one go can feel overwhelming, and you might skip steps to jump to something more advanced. But it felt only half-baked information to give you only the Rule of Thirds and nothing else.
I trust you can take your photographic journey step by step. Starting with the Rule of Thirds and then coming back to this post to explore the rest.
The Rule of Thirds is the most well-known because it’s easier to apply and works in most cases. But, sure enough, there are other composition rules…
Golden Ratio
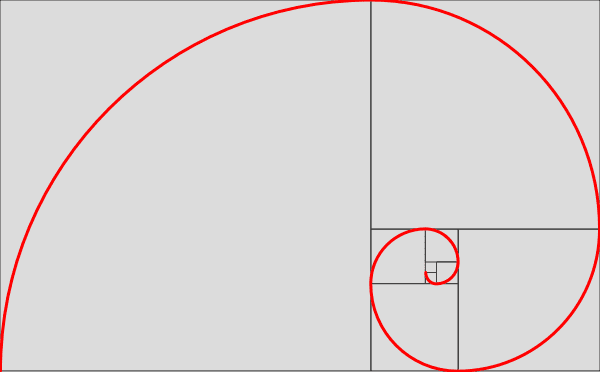
You can think of the Golden Ratio as a Rule of Thirds on steroids! It’s also known by other names, like Divine Proportion, Golden Spiral, Fibonacci Rule… It’s based on the recognition of a repeated pattern in nature by Leonardo Fibonacci in the 13th Century. He saw this ratio appearing in many living things (hence the “divine” name). And it turns out this was also pleasing to the human eye. The ratio is approximately 1:1.618.
You’d be astonished to learn how often this is found in nature: the number of petals in flowers is often a Fibonacci number; the spirals of sunflower seeds; shells; animal bodies; tree branches… Even tornadoes and galaxies!
It’s been used by architects (Parthenon), artists (Mona Lisa, Last Supper), designers (Apple logo)… But these are only a few examples of the billions around us. It’s not often discussed among photographers because it feels confusing and less straightforward than the Rule of Thirds.
But this can be used in many ways to create an image.
The simpler way to visualise it is in a grid similar to the previous one. But instead of equal splits 1+1+1, these will be more like 1+.618+1. See the difference below and how it generates from the golden spiral.
Unfortunately, this is not commonly implemented in cameras and devices. So, unless you have a trained eye, you’ll likely find yourself using it only in post-production. This composition rule has been implemented in Adobe Lightroom since version 3. You can use it as an overlay in your image to help you find different ways to crop and reframe.
A little help from Adobe Photoshop Lightroom
In Lightroom, you can access composition overlays from the Develop module with the hotkey R.
You can cycle between the different options with the hotkey O and use SHIFT+O to apply different orientations to the same overlay. Lastly, with the hotkey X you can cycle between portrait and landscape cropping.
Example

Triangles
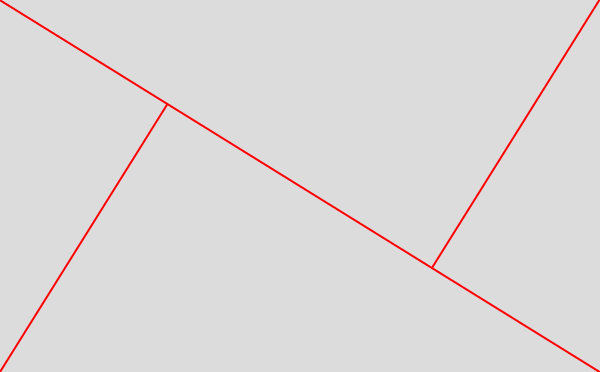
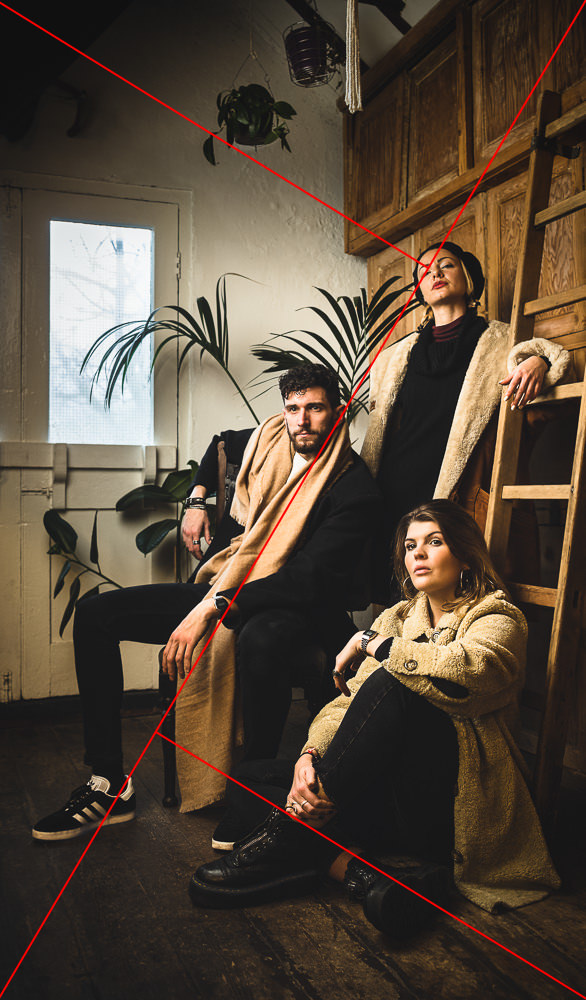
This is the other largely used composition rule. Again, this can’t be found in cameras and devices (most of them only implement the Rule of Thirds), but it’s available in editing apps. It is very effective with images to emphasise perspective, to give a sense of depth and add dynamism.
The construction of the lines is pretty simple: you draw one diagonal from one corner to the opposite and then draw 2 more lines from the other 2 corners so that they are perpendicular to the first. Like the previous rules, you get lines and main points of interest.
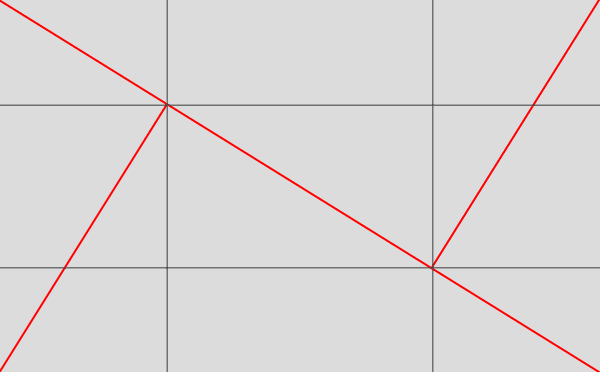
You understand by now how all of this works, so I’m quickly moving to the example:
Break the Rules
I covered the most common composition rules, but there are more to learn and experiment with.
The fun part of knowing all the rules is that you also know how to break them! But beware: I said “break them”, not ignore them. Ignoring a rule will produce a random composition, whereas breaking it usually provides a more considered result. As with nearly everything in Photography, the secret sauce is to have intent.
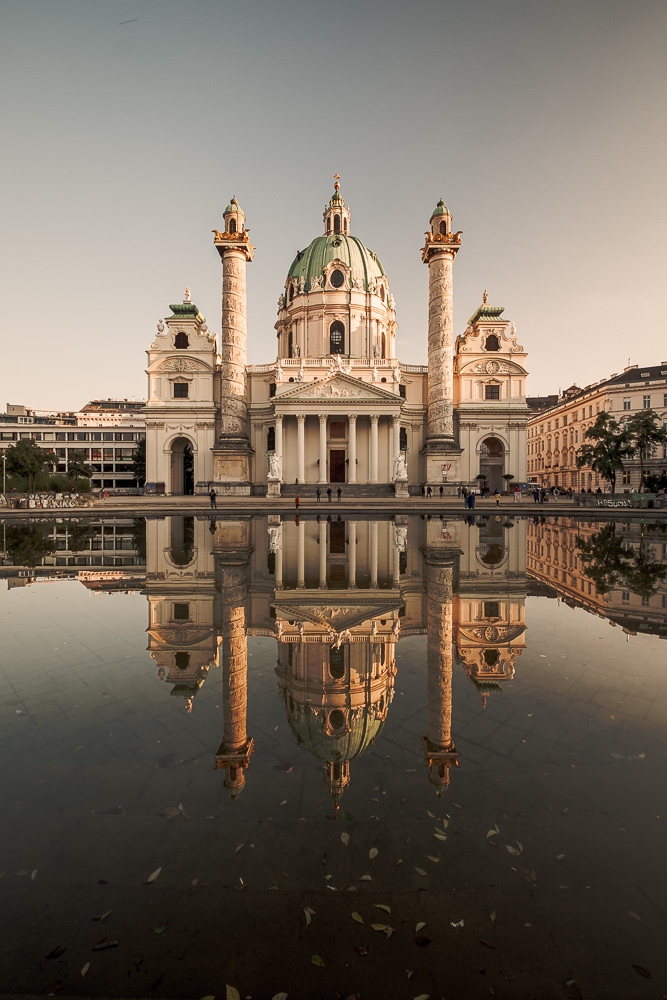
You can achieve great results when you break the rules dramatically. For example, shooting a landscape with a lot of space left for the sky, or a tiny subject in the corner of a vast scene (or both, see below). Or shooting a perfectly symmetrical composition. For example, a reflection on a lake often works well when the image is evenly split: the subject in the top half and its reflection in the bottom half.

In portraiture and still life, there are also advantages with putting your subject in the centre of the shot. It brings the subject to the centre of the viewer’s attention and reduces the importance of an otherwise distracting background.
In the end, it’s all about your subject and what you want to emphasise in a scene. But knowing the rules and when to break them will always produce better images than shooting randomly. Because they result from deliberate choices. So, experiment, play around, but do it deliberately. When you know “why” you have shot an image with a specific composition, you are on the path to becoming a better photographer.
Have a great journey there! :)
Pinterest-ready shareable image: